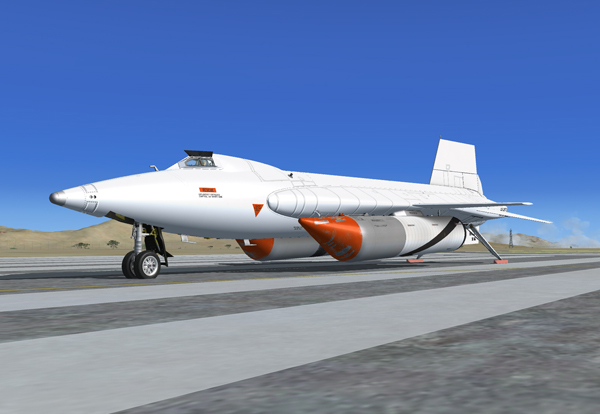
X-15A-2 SE before servicing (Prepar3D® v2 screenshot).
In the real world, propellants and gases were loaded onto both the B-52 carrier and the X-15A-2 by ground personnel before each flight. During captive flight (while the rocket plane was attached to the B-52 and gaining altitude), the X-15A-2 internal liquid oxygen tank was topped off from the carrier airplane supply.
To simulate the complex servicing of the X-15A-2 rocket plane, both from the ground and from the B-52 carrier, a simplified (fictitious) service panel is provided. The service panel is located in the upper section of the center pedestal in the virtual cockpit.
Servicing the X-15A-2 is achieved by the click of a single button on the service panel. The service panel also includes an external power switch to provide electrical power from an external source before takeoff or launch, an external tanks option switch and an unlimited fuel option switch.
Refer to "Service Panel" for more information.
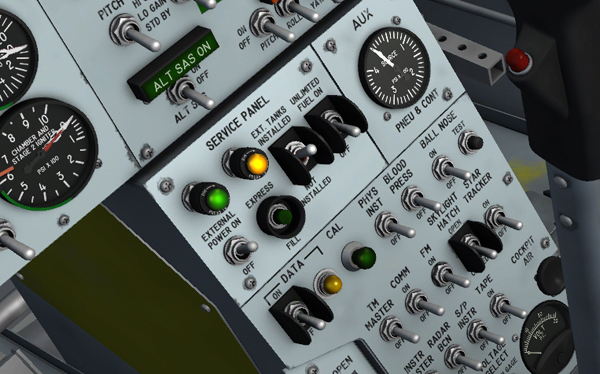
The X-15A-2 SE service panel, in the upper section of the center pedestal.
The service panel provides electrical power to the X-15 aircraft before the APUs can be turned on. This simulates electrical power being supplied to the X-15 either from a ground receptacle or from the carrier airplane:
Electrical systems can be monitored on the system monitor panel, available from the "Views/Instrument Panel" menu item on your simulation platform's top menu bar (see below).
In a real X-15A-2 mission, a normal burnout occurs after approximately 90 seconds (no external tanks) to 150 seconds (external tanks installed) of XLR-99 engine operation, after the propellants are exhausted. This is the default mode of operation in the simulator.
An "unlimited fuel" option switch is provided, on the service panel, to allow for unlimited-duration burns. Simply turn the two-position switch [27, fig. 5-3] to ON if you prefer this mode of operation:
Note: As long as the engine master switch [63, fig. 5-1] is set to OFF, the fuel consumption can be reset to normal at any time by returning the unlimited fuel option switch to the OFF position. The switch position cannot be changed if the engine master switch is set to ON.
An external tanks option switch [26, fig. 5-3], on the service panel, is provided for choosing whether or not the X-15A-2 external drop tanks are installed. Make sure this switch is set to INSTALLED for true X-15A-2 operation (external tanks installed):
Note: The external tanks option switch cannot be set if the propellant tanks are pressurized (vent, pressurize, and jettison lever [11, fig. 5-4] not at VENT).
Note: The X-15A-2 external tanks provide an additional 1053 gallons of anhydrous ammonia and 770 gallons of liquid oxygen which corresponds approximately to an additional 60 seconds of engine burn time.
An “express fill” button is provided, on the service panel, to accelerate servicing procedures and concurrently fill all internal and external tanks in a single operation. Each tank can be monitored on the system monitor panel, available from the "Views/Instrument Panel" menu item on your simulation platform's top menu bar (see below).
To service the X-15A-2 SE, proceed as follows:
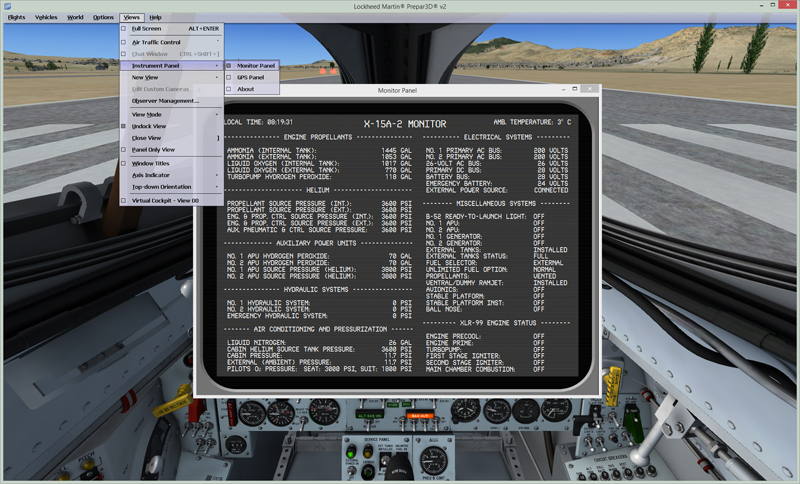
Servicing can be monitored on the X-15A-2 SE system monitor panel (Prepar3D® v2 screenshot).
Check each tank, on the system monitor panel, for proper filling:
"Engine Propellants" section:
"Helium" section:
"Auxiliary Power Units" section:
"Air Conditioning and Pressurization" section:
Note: The tanks will be topped off automatically to prevent overfill.
See also:
Turbopump Propellant H2O2 System
Engine and Propellant Control Helium System
Air Conditioning and Pressurization System